A wall alignment and bracing system is an essential piece of equipment for any ICF installer, and mastering the basics of this tool is essential.
ICF projects are bigger and more complex than ever before. In the U.S., OSHA has tightened safety requirements. Fortunately, bracing companies have developed innovative solutions that make it easier and faster than ever to ensure workers stay safe, and walls stay straight, level, and plumb on pour day.
Bracing 101
Turnbuckle ICF bracing was developed in the 1990s, and is now industry standard, available from at least half a dozen different companies. Every major ICF manufacturer strongly recommends turnbuckle bracing, and some sell a private-label version. See chart printed on p.14.
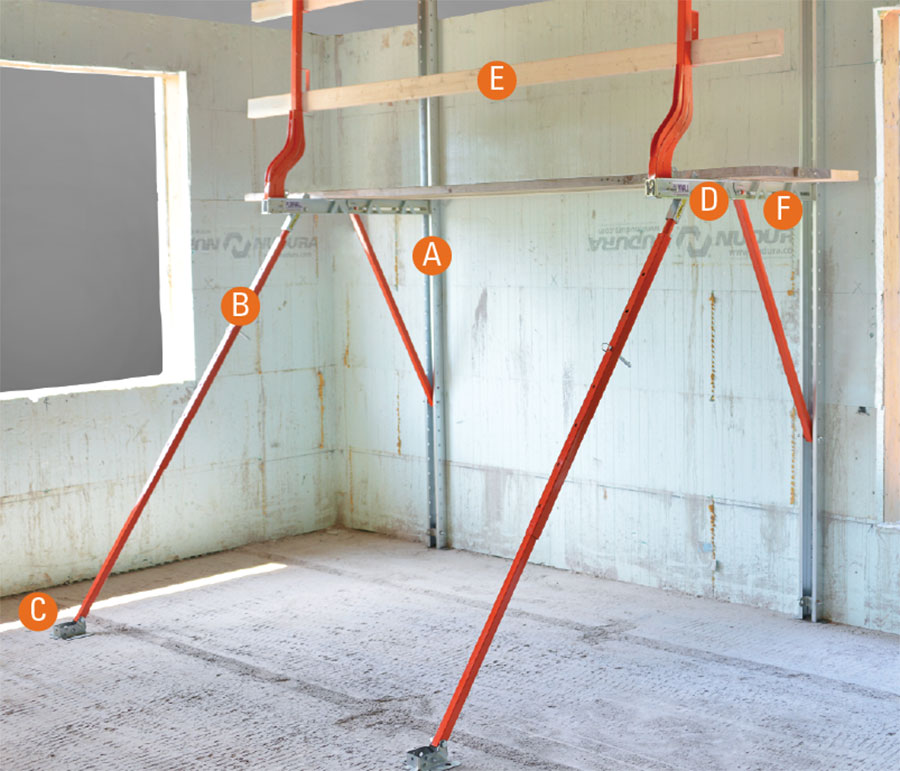
An ICF brace should include (A) a strongback, (B) adjustable leg, (C) footplate, (D) platform bracket, (E) safety rail, and (F) the bolts and pins to assemble.
Mastering the basics of this tool is essential for any ICF installer. “A wall alignment bracing system is as much a standard tool for building with ICFs as a paintbrush is to a painter,” says Ian Giesler. “If you think that you can build perfect walls without a bracing systems, you’re only kidding yourself.”
For do-it-yourselfers and small-time contractors that build only two or three houses a year, the cost of turnbuckle bracing systems may seem cost-prohibitive, but there are options. Bracing rentals are becoming increasingly common, and odds are that the local form distributor can connect you to a source. Giraffe Brace recently launched an online bracing locator tool, which makes the process even simpler. Fab-Form’s Zont system is a low-cost, adjustable wooden bracing system. It requires significant onsite fabrication, but the cost is far lower than all-metal-systems, and has full adjustability. The builder has to supply his own wood, but it can sometimes be reused for framing interior walls. “Our system is 1/10 the cost of metal bracing,” says Rick Fearn, president of Fab-Form. “The entire system fits in a pair of five-gallon buckets.” Fearn is adamant that wood is a viable bracing material. “We’ve been bracing concrete with 2x4s for 200 years.”
The various brands of bracing differ in set-up, storage, and maintenance requirements, but their use is quite similar.
Components
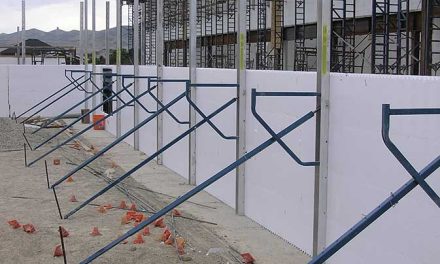
Turnbuckle bracing consists of four basic components. A steel or aluminum “strongback” is attached to the ICF wall, usually after the first three courses are stacked, to keep the forms straight. These are available in various lengths, typically 8, 10, and 12 feet. Near the top, a platform bracket for scaffold planking juts out from the strongback. Sometimes this bracket is attached as a separate piece, on other systems, it folds out. The platform often includes a slot for a safety handrail to slide into place.
Running diagonally from the platform to the ground is the turnbuckle, or leg kit, which contains a heavy-duty threaded rod. At the lower end of the leg is the footplate, which is fastened securely to the ground. By turning the threaded shaft, the wall can be adjusted for plumb, even after being filled with concrete.
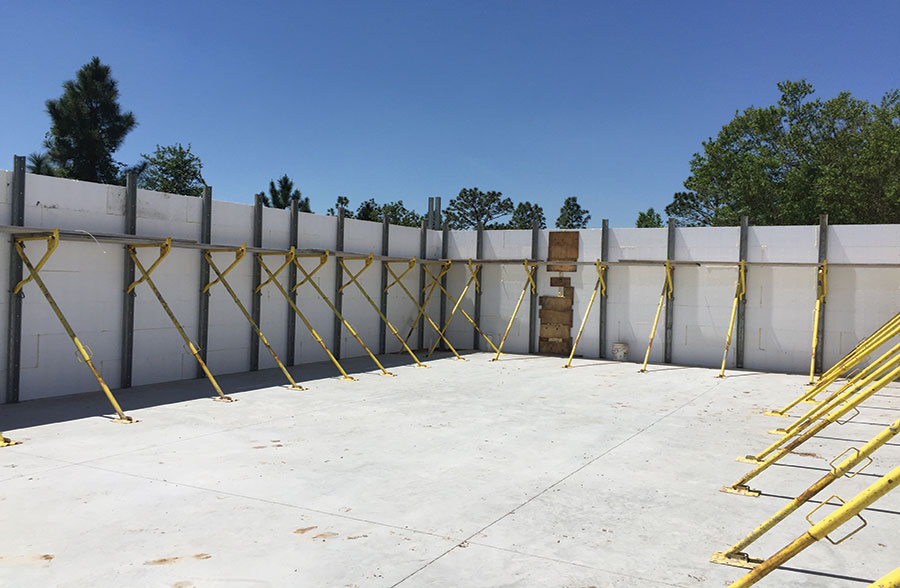
Spacing
Spacing between braces is determined by a number of factors, primarily wind loads on the wall, concrete pressures during the pour, and the length of scaffolding planks. Nearly always, this works out to be no more than 5 to 6 feet apart, regardless of the brand of ICF used. Additional braces are needed near window and door openings, on corners, and T-intersections.
Bracing should be placed no more than 5 or 6 feet apart.
A good rule of thumb is that 32 units will be sufficient for a 1,500 sq. ft. basement. If the design has large windows or lots of corners, set up additional bracing before the pour.
Attachment
Each strongback will have a number of slots spaced vertically along its length.
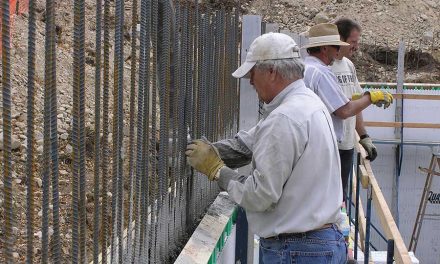
The strongback is placed against the wall, and fastened to the form’s furring strip using a #10 or #12 screw. Place screws in the middle of the slot, and get them snug, but not tight in order to adjust the wall for plumb and accommodate any form float or compression during the pour.
The scaffold supplier should provide you with very specific attachment details, including the exact size and type of screws to use and placement specs. This is critical, because the scaffold system was engineered, tested and certified using specific screw fasteners, and may not perform as designed if other fasteners are used.
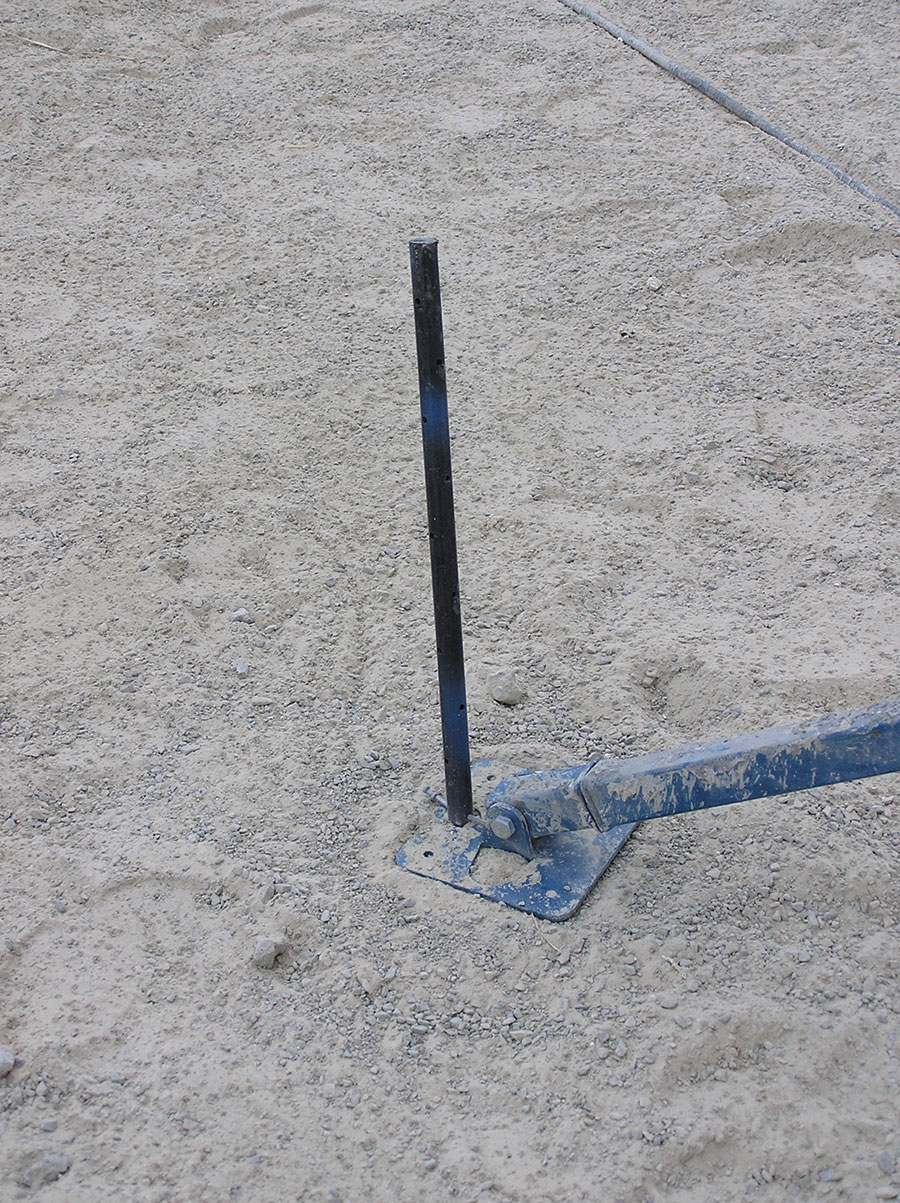
Fastening the Footplate
On most jobs, the braces are set on the interior of the wall. For many basements, it’s the only option. On other jobs, it’s a matter of convenience, as the interior floor is flat and smooth.
Plumb the wall with a level, then fasten the bottom of the turnbuckle shaft to the ground. On nine jobs out of ten, a form stake is hammered through the footplate to secure it. If a wooden subfloor is already in place, it’s just as easy to screw the footplate securely to that.
If a concrete slab is already in place, or if the floor contains hydronic heating, other methods are used, such as fastening short lengths of 2×6 to the floor using a quality construction adhesive. Wait for the glue to cure, then screw each footplate to the corresponding length of 2×6.
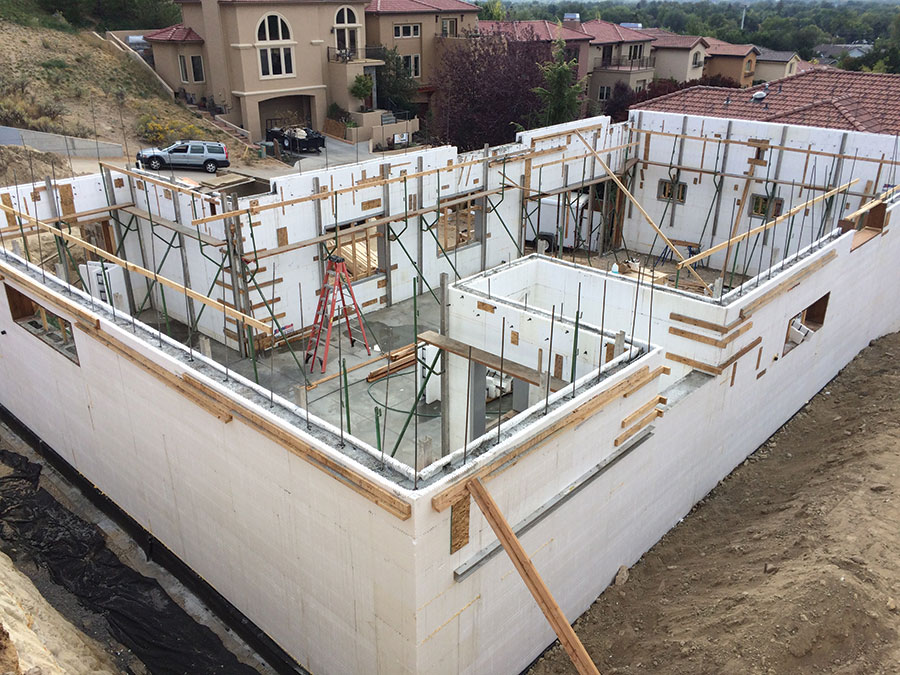
Experienced contractors recommend squaring and supporting the wall early in the build, usually when the wall reaches 3-4 courses high, but sometimes even earlier in windy areas.
Adjustments
Before the pour, the contractor sets a string line between the top of the corner strongbacks. From there, it’s simple to adjust the remaining braces to just touch the string. Some contractors have found that ICF walls tend to move outward when filled with concrete, and deliberately set the wall ¼ inch inside-of-plumb before the pour. As soon as the concrete is in the wall—while it’s still wet—they double check that the top of the strongbacks are still barely touching the string, and make adjustments as necessary.
OSHA Regs
The U.S. Occupational Safety and Health Administration (OSHA) has a literal book of regulations covering scaffolding. Significant stringent new rules were added in 2013. Basically, all workers more than six feet above the ground are required to have some sort of fall protection (roof tethers, guardrails, safety nets, etc.) In California and on military projects, the requirements are even stricter. Because tethers and harnesses interfere with work, and nets are impractical, guardrails are industry standard. A bracing system that allows easy movement and access to materials while providing an OSHA-compliant guardrail is essential. The walk platform must be at least 18 inches wide, rated to support workers and equipment, and must include a toe board if the walk surface is more than 8 feet above grade. Finally, the guard rails must be able to support a load of 250 pounds placed perpendicular to it, and meet specific
height requirements.
European standards are even more strict, and bracing manufacturers have upgraded their products to comply. For instance, Plumwall now offers metal safety posts that easily pin into place. The posts are engineered to far exceed OSHA and European guardrail standards, and are powder coated in high-visibility safety orange. The revised All-In-One brace also features a wider platform (22 inches of available plank width) and can be adapted to ICF walls up to 24 feet high.
One more note on safety: platform brackets and turnbuckles must be attached to the strongbacks with the specified pins. Substituting another bolt, a short piece of rebar, or perhaps a spike is not sufficient and creates both a safety risk and a sure-bet safety violation when the OSHA inspector shows up.
What to Look For
More than half a dozen turnbuckle bracing systems are available, each with their own unique traits. While each installer may weigh factors differently, here are the common variables:
Turnbuckle Style and Shape: This is the number one factor for most contractors. Does it move the wall easily, and does the wall stay put when you walk away?
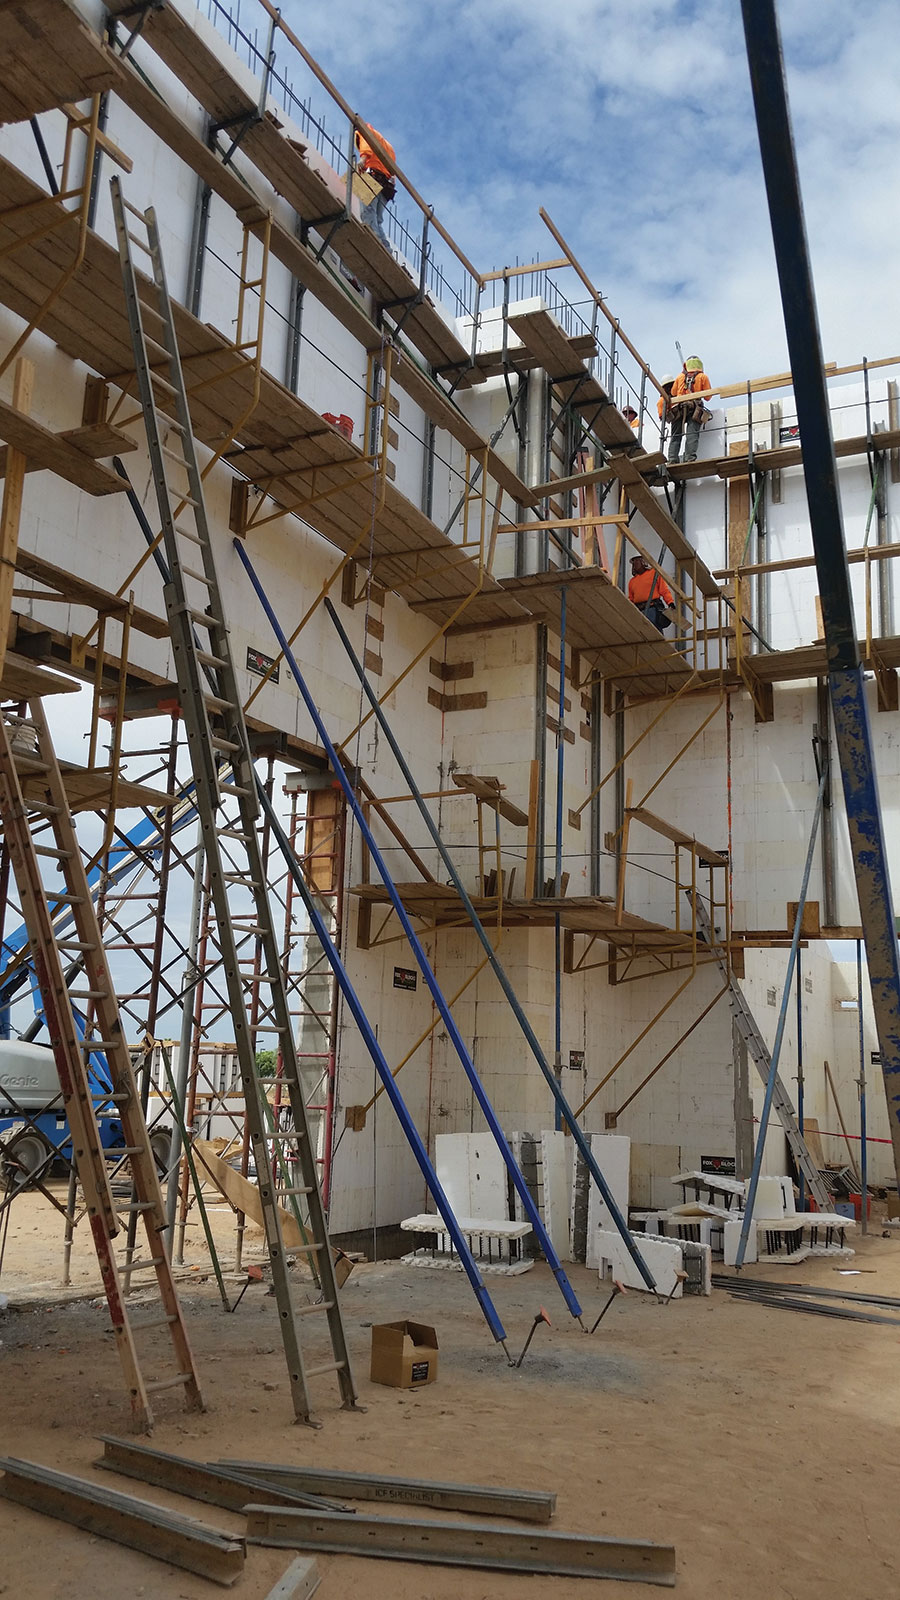
Tall wall bracing without intermediate floors is complex, but experienced contractors routinely pour walls more than 30 feet high.
Most brands have a length of travel of around six to eight inches. Some braces use coil thread, others standard thread, which affects how many turns per inch are required.
To make adjustments, some brands—like Giraffe and the discontinued Arxx Brace—use circular tubing with welded handles. Others use a turnbuckle with a square cross section, and a few require a wrench. Fab-Form’s Zont, along with several others, use “provide-your-own” 2×4 lumber, with a small turnbuckle at the lower end.
Plumwall’s system can be manipulated with a cordless drill from up on the wall, allowing a single worker to measure and adjust. This may be an advantage for small crews, but on jobs with more than three individuals, it fades in significance.
More important is protecting the turnbuckle from splatter. Giraffe uses an internal thread for protection. Others, like Hilltop, put the threads at the bottom of the turnbuckle so concrete splatter is not an issue.
Strongback Material and Strength: The balance between strength versus weight is varies between contractors. One builder may need to be able to haul three or four guys, 80 braces, 300 ICF blocks, and all the tools needed, at highway speeds with a 3/4 ton pick-up. He probably prefers extruded aluminum strongbacks because they’re lightweight and don’t rust out.
Steel is stronger, but much heavier, and must be galvanized or power coated to prevent rust. Some manufacturers use thinner material to reduce weight and costs, so be sure the strongback is rated for the loads it will be subjected to.
In recent years, several companies have begun offering L-shaped strongbacks for corners to simplify a task that previously required two braces.
Durability: Closely related to weight and strength is the durability of the system. This is especially important for distributors planning a bracing rental business.
“You want low- or no-maintenance bracing,” says Ken Williams, at Giraffe Brace. Think about the abuse the system will take. You don’t want to be concerned about the condition the equipment comes back in.” He recommends checking if the bracing manufacturer offers a written warranty, and the availability and cost of replacement parts.
Versatility and Ease of Use: Consider the versatility and completeness of the equipment as well as the price. Does it include a scaffolding bracket or built-in safety rail? Does it require manual assembly with a variety of bolts and pieces or does it have quick-locks? How many additional components are needed to convert it for stemwall and tall-wall applications?
Storage: Unless you’re a busy distributor, bracing will spend more time in storage than on the job. Plumwall’s “foldaway” design keeps everything—pins, rail posts, platform bracket, turnbuckle, etc.—tucked neatly inside the strongback. Detachable platform brackets allow units to store more compactly. Storage crates are useful for rental operations, hauling bracing to a jobsite, and moving equipment from floor to floor. Plumwall will powder coat their bracing crate to match the contractor’s company colors, and laser cut the company logo into the plate steel on each end of the crate. “That’s security and advertisement,” says Chad Hiller, a senior executive at Plumwall.
Cost: A single brace can cost from $100 to $200, yet virtually none of the manufacturers said the up-front cost of the purchase was a major hurdle. Contractors who pour multiple projects year after year know that a good brace will actually save them money in the long run.
To make comparison easier, this magazine has compiled a chart listing the major features of all the major bracing systems on the market, printed on p.14. It is not intended to contain every data point needed for a purchase decision. Readers will note that one of the most important data points—price—is completely absent. A number of other features, like how well it can be modified for tall walls, and its ease of storage and transportation, are only hinted at. Yet the chart contains enough information that it should be fairly easy to compile a short list of candidates that meets your specific requirements.
Whatever type of bracing is chosen, become very familiar with the installation manual. Know it inside and out, including all the specifications for fastener sizes and spacing, load ratings, etc. Be sure you have all the required pieces gathered at hand before you start to construct your scaffold. This way you won’t be tempted to substitute or leave out critical components in the rush of assembly.
Bracing is an issue every ICF installer deals with on every job. And the higher the walls go, the more complicated it gets. Yet by following a few simple guidelines, and knowing what equipment is available, just about any wall can be braced safely and easily.


Thanks for posting this article I’m in the process of deciding which ICF bracing system to purchasing for our small rental business. Currently we have Giraffe bracing, the only problem I have with it is there are so many parts to loose. We bought a few used racks of Plumwall which are great any other brands you could suggest to look into before I pull the trigger on more Plumwall. Ideally I’m looking for a One Piece solution similar to Plumwall ?