
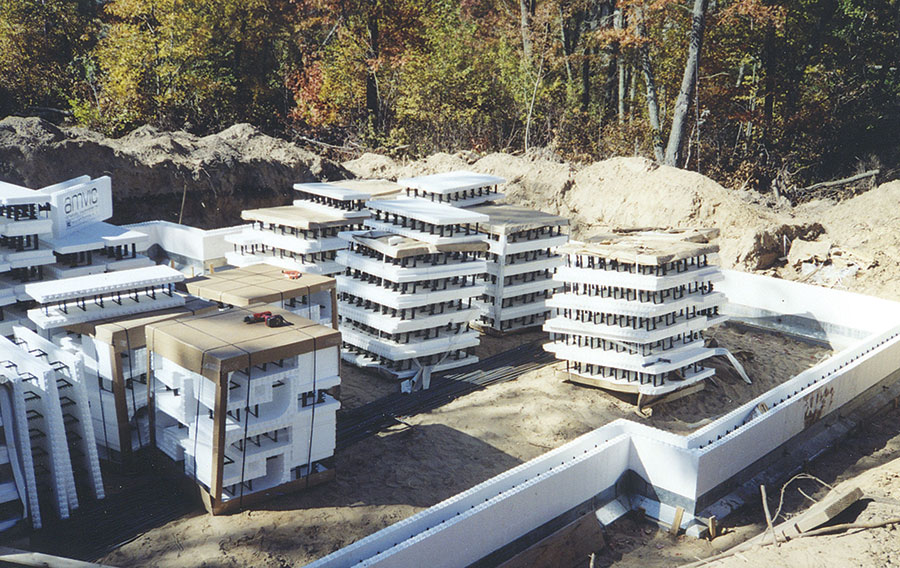
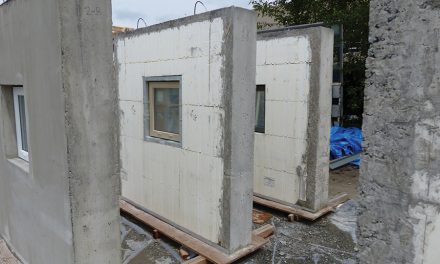
On any ICF project, getting the first course of forms square, level and plumb is absolutely critical. This can be accomplished using one of two methods.
The first, and most common method, is to “dry-set” the first courses. Here, the contractor lays out the wall and begins stacking after the footings have dried. It has the advantages of giving the contractor all the time he needs to make sure the courses are level, and it’s relatively easy to make adjustments, shimming or shaving the foam as necessary to get a good fit. (See Getting a Level Footing in the Oct. ‘06 issue p. 26)
The drawback to this method is that it creates a cold joint at the footing, and the ICFs have to be attached to the hardened concrete using foam adhesive or metal track. Some installers find that the vertical rebar is significantly out-of-alignment, and new steel has to be drilled and glued into place.
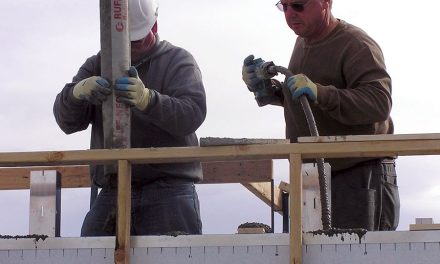
The second, less-common method is to “wet-set” the forms, placing the first row of blocks directly into the wet concrete.
The drawback to dry-setting is that it creates a cold joint at the footing, and the ICFs have to be attached to the hardened concrete using foam adhesive or metal track.
This high-stakes technique can save considerable time—if it’s done correctly. It eliminates the cold joint, and is especially useful for stem walls, since the pump truck only has to make one visit to the jobsite. Additionally, it ensures reinforcing steel is centered in the wall’s concrete core, and reduces the safety hazard caused by exposed vertical rebar. And since the forms are embedded directly in the concrete, it eliminates the need to attach the ICF to the footing.
However, without a good, trained crew and precise layouts, wet-setting can be disastrous. The “screw-up factor” is lurking here, given the time constraints of working with wet concrete, and mistakes at the footing level typically get amplified as the walls go up.
Luckily, in the past year or two several new systems have been developed that eliminate much of the risk, making wet-setting easier than ever before.
Traditional
Wet-Set
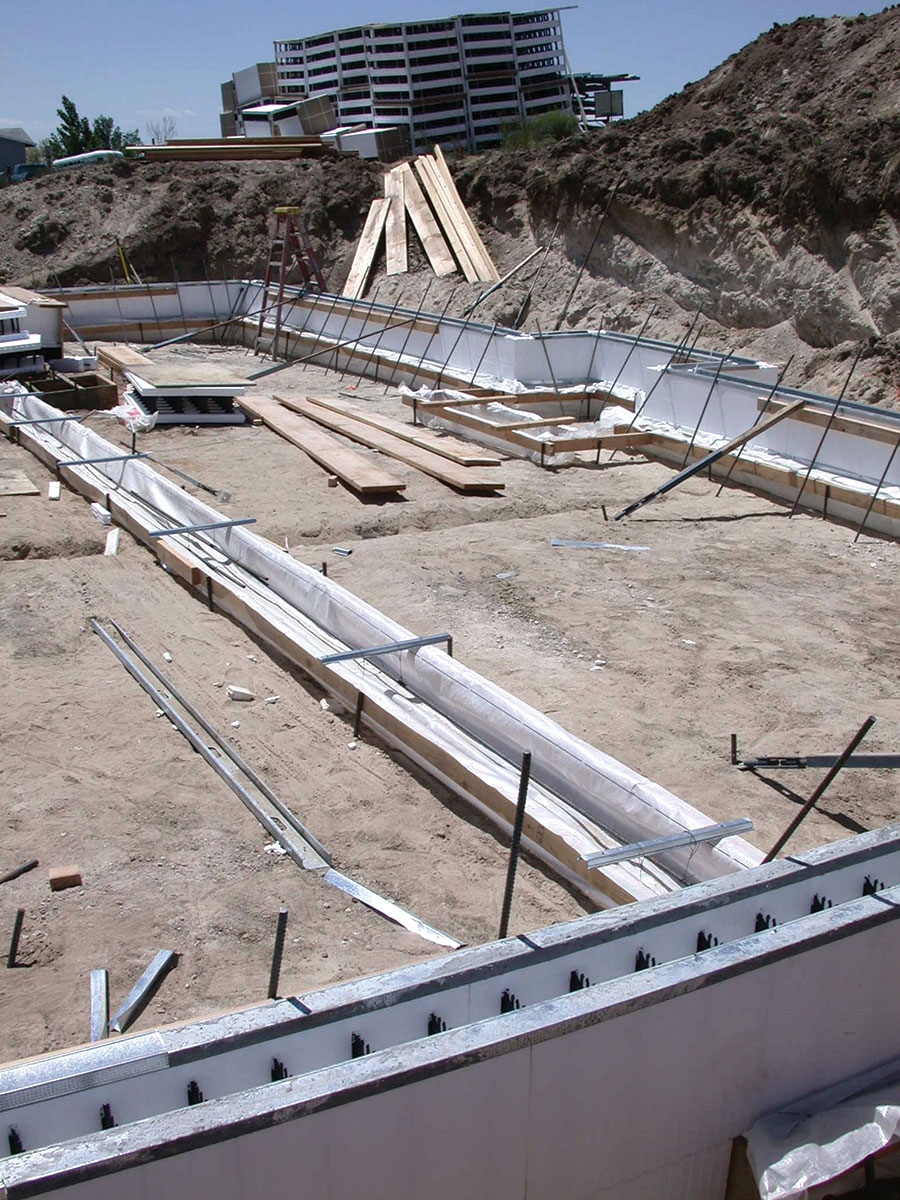
Despite the risks, some contractors still swear by the traditional wet-set method, which generally follows these steps: First, the footing forms are laid out and staked just as with any job. Then a set of string lines are set up above the forms. These strings correspond to the exact height of the first course of ICF blocks and mark the outside edge of the ICF wall. Getting these string lines dead level, perfectly square, and exactly in the right place is critical, as the entire build will only be as accurate at the string lines.
 Experienced contractors recommend placing the string stakes well outside of the footing forms to prevent accidentally bumping them when the footings are poured.
Once the strings are in position, pour the footing, screed the top, and quickly double-check the strings for level and square to make sure they didn’t get moved during the pour.
Make whatever adjustments are necessary, then carefully place the corner forms, building toward the middle. Like a block mason building with CMU, each ICF is squared to the string and adjusted to the perfect height.
Brad Partridge, a Florida installer who uses this method, says the job will go more quickly and easily if several forms are connected end-to-end before placing them on the footing. “We have found that using plastic ties between blocks on the first course helps to keep the block in line and makes the second course work go faster,” he says. Zip ties will work with any ICF. A few brands, such as Arxx (the Claw) and PolySteel (Carolina Clippers) have developed special wire ties for this purpose.
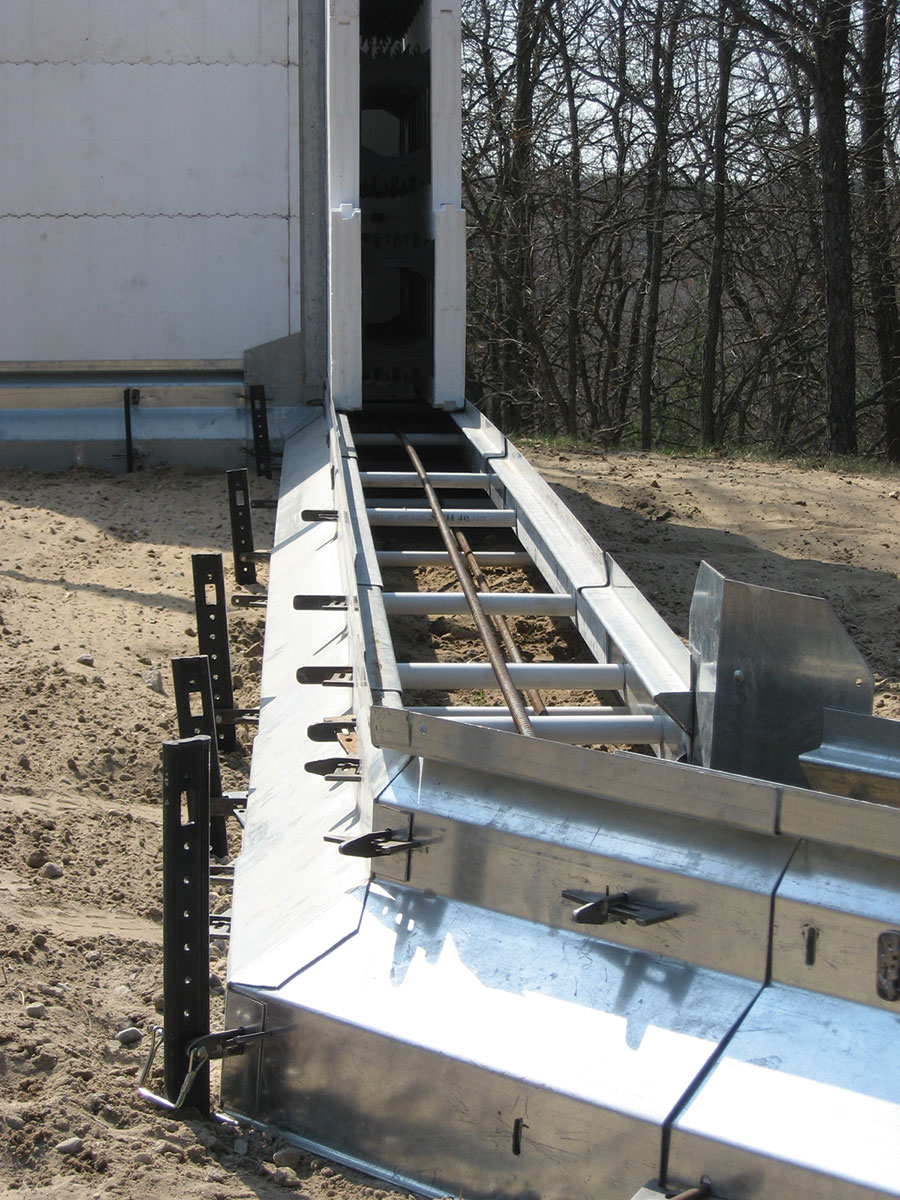
Plastic braces from Pro Set keep the forms centered during the pour. They work with any stay-in-place footing form system.
Once the first course is in place, the crew stabs the vertical rebar into the still-wet concrete.
Chris Johnson a Napa, Calif. contractor, cautions that this method only works “if you have a crew big enough so you have guys pouring, leveling, setting the block and checking it’s accuracy for straight, plumb and level at the same time,” which he estimates takes a crew of four or five, minimum.
Keys to this method are an accurate string layout and a large, trained crew that works well together.
Dave Taggett, at Mikey Block, has wet-set ICFs on dozens of projects—most of them slab-on-grade—with no problems. “For these applications, we use an ICF with a cementious face, which makes it a little heavier than most ICFs on the market,” he says. “That eliminates all of the float and movement that can occur with all-EPS blocks.”
Taggett sets his string lines so that the blocks get embedded a half inch into the footing. A video demonstrating his method is available on our website.
For stem walls and other applications, Taggett says panelization works extremely well, with the cementious block on the bottom and the rest of the wall built with regular ICFs. (For more on panelization, see the story on p. 28 of this issue)
Mono-Pour
A different method, sometimes called “mono-pour,” involves more prep work, but can be done with a smaller crew. Johnson explains how it’s done. “Your footing forms or trench is ready for footing, two courses of block are installed and suspended over the footing with all rebar/dowels installed,” he says. “Once you ensure the block is straight, plumb and level, you pour the footing and about 6” up into the first ICF block (This leaves enough dowel rebar exposed for a proper non contact lap splice). This method requires two guys who know what they’re doing.”
Pro-Set
Last year, 440 Products introduced Pro Set, a plastic bracket designed to make mono-pour jobs go more smoothly.
“Our primary goal in developing Pro Set was to have a professional way of wet-setting forms,” says Dan Moore, inventor of the product. “There are additional benefits, though, such as being able to pour the slab, footers and up to 4 vertical feet of ICFs in a single operation.”
The system is fairly straightforward: a Pro Set support brace is screwed to the tops of the footing forms every 3 to 4 feet around the perimeter. ProSet is designed for a 20” footer, which is adequate for most residential applications. The company is developing a system for footings up to 3 feet wide. Guides on the top of the support can be adjusted to match any common ICF width.
“A 32×50 basement will have 164 lineal feet of footer, which would require 41 supports,” figures Moore. “Two men can set up a project this size in about an hour and a half once the corners pins are set, allowing for the footers and first row of ICFs to be installed and poured before noon.”
Pro Set advantages include a well-secured course of forms, perfectly centered over the footing, that will not move when filled with concrete. At current prices, the 41 supports for the sample job above would run about $525 plus taxes and shipping, and are not reusable.
Fastfoot
Method
Paul Menzel, an Idaho-based ICF contractor, has developed another mono-pour method using Fab-Form. “It’s a really easy way to get a perfect footing,” he says. “You don’t need to clean any thing up and it’s cheaper than lumber.”
He starts by driving stakes in the ground and fastening 2x4s to them at the height of the top of the footing. Once the boards are level, he sets the Fastfoot fabric over boards and fastens the centerline—marked on the material—to the ground. He then fastens the material to the 2x4s using a hammer-tacker and 3/8” staples, using the adjustment lines printed on the fabric to ensure the Fastfoot stays centered and maintains the right width on the ground.
The Fastfoot method uses a proprietary fabric, coupled with a system of reuseable stakes, tracks, and boards, to create a solid mono-pour system.
Next, he screws “hat-track” or sound channel across the tops of the boards every two feet on center. These are used to hang the horizontal rebar in the footing.
The Fastfoot is then folded back over the hat-track and sheet metal angle strips are screwed on, sandwiching the Fastfoot in between. The spacing between the angle strips is equal to the width of the ICF block.
The footing is now ready for stacking.
Menzel uses plastic zip ties to secure the blocks to the hat track and eliminate float, but says screwing through the sheet metal into the furring strips would also work.
“You can ensure that your walls are laser-level, plumb, and straight before you ever pour,” says Menzel.
He pours two courses with the footing. If the wall is going taller than that, he tapes the tops of the blocks to keep the interlocks clean, and stacks and pours the rest later.
“I do know of contractors that have monolithically poured a full eight feet of block on top of Fastfoot,” he says. “The danger here is that you have a huge load of steel hanging on your forms, so they must be staked and braced sufficiently.”
Once the concrete has cured, the wood can be stripped and reused. The boards should be perfectly clean because they were wrapped in fabric. Scot Smyth, a contractor who used this method for his home in Colorado, recycled all his footing boards by using them for window bucks.
Says Menzel, “The first one takes a while, but once you get used to the system it’s simple.”
Key
Footing
Forms
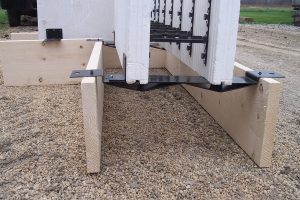
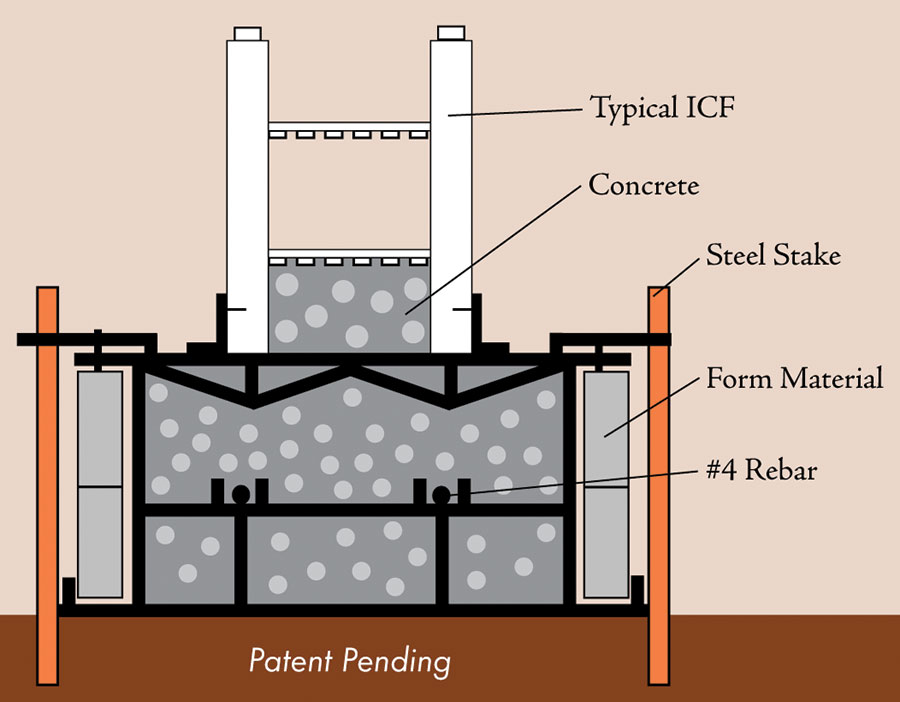
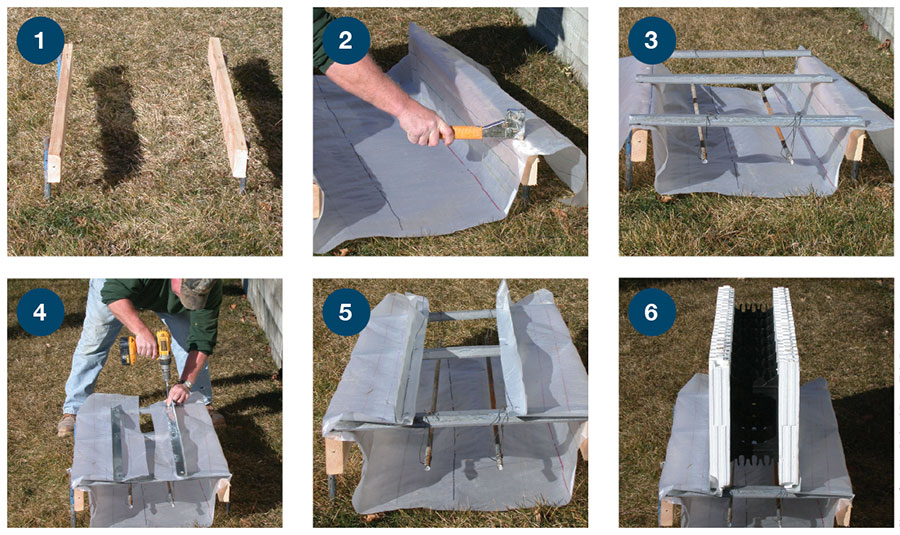
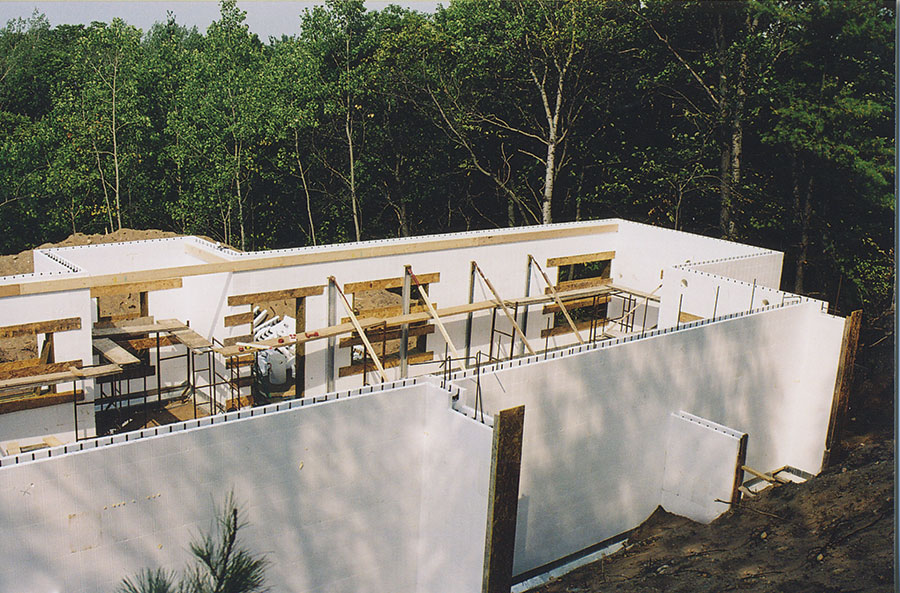
The Key Footing Form, developed by Neal Lesmeister over the last several years, is the most elaborate solution to wet-set or mono-pour challenges. Using the steel forms, the entire ICF wall can be set up and braced before the footing is poured.
Key footing forms create a bell-shaped footing that is pored monolithically with the wall. Poured in lifts, walls as high as 10 feet have been poured at the same time as the footing without any problems. Most bracing is easily adapted to the forms (inset.)
“It has tremendous advantages,” says Lesmeister. “You get to eliminate a pour, which eliminates a pump truck, another rebar set, another layout. It’s a tremendous labor saver. Second, you get a higher quality job, with no cold joint, no junk in the wall, or any of that stuff. Third, your quality goes up because the wall is absolutely level, plumb and perfectly centered on the footing every single time. Finally, there’s the safety factor of never having steel dowels sticking out of the footing. You drop the rebar once, from the top, after the entire wall has been stacked.”
The forms are made of heavy gauge steel to stand up to a lifetime of use, and form a bell-shaped footing. Spacers, made from schedule 40 PVC pipe, control the width of the cavity. Lesmeister says an average footing will use about $25 worth of pipe, and can be cut in less than five minutes. The spacers are held in place with regular bolts and wedge keys.
Once assembled, the forms are staked into place and sprayed with a form release agent. Then the ICF build can begin. Lesmeister recommends connecting the corner forms to the footing forms with a heavy duty screw and connecting the intermediate blocks to the PVC spacers with zip ties to keep things from moving.
If the wall is tall enough to require bracing, a special base plate is attached with a self-tapping screw for the strongback to rest on. The system is compatible with any bracing system.
“The highest we’ve poured in a single day is 14 feet,” says Lesmeister. “The forms are strong enough to hold 16 feet of conventional steel wall forms, so you could probably go as high as 20 or 30 feet.”
On a standard ICF with a 6” concrete core, a Key Footing would measure 12” deep by 20” wide. “Because it’s a bell shape,’ says Lesmeister, “you get the strength of that extra depth, but it doesn’t use any more concrete than a common 8”x20” footing. Plus, when you estimate the volume, it’s always exact.”
A video of this method is available on the icfmag.com website.
Conclusion
Wet setting techniques have clearly evolved significantly over the last several years. Using the new technologies mentioned above, ICF contractors may discover significant time and labor savings, especially on stem-wall construction. Using one of the mono-pour methods listed above, a crew could feasibly build and pour an entire stem wall in the time previously required to install the footing.
Keep in mind, however, that wet-setting always involves a race against time, and everything must be staked and set rock solid prior to the pour.
Johnson, the California-based installer, was asked on an ICF forum if traditional wet-set or mono-pour was better. “Both methods are good to use depending on your labor force,” he responds. “I run small crews so Method 2 [mono-pour] works for me.”
“But,” he cautions, “either method is not for the novice or first timer. Pour a conventional footing, wait till it starts to set up, snap lines and then start stacking.”


